Wednesday, December 14, 2011

A Christmas Treat

Toffee is probably my favorite thing to eat, period. It's crunchy and delicious and completely addictive. My mom always made it at Christmas (and only at Christmas), and I looked forward to it all year. I still do. Only now I've learned how to make it myself. Growing up, I thought that making toffee was extremely difficult and messy. Turns out, it extremely quick and easy (takes about half an hour). But since toffee is just caramelized butter and sugar, it's really Really unhealthy. But oh it's soooo gooooood.

Here's how to make your own toffee. I usually use a candy thermometer, but you don't have to.

Before you start, line a large baking sheet (or a 16" pizza pan, if you're me) with parchment paper (you can do this while the toffee is cooking if you forget beforehand). Then put four sticks (2 cups) of salted butter (this is critical) and 2 cups of sugar in a large (2 quart, I think) saucepan over medium heat. Stir it together as the butter melts. The candy thermometer is optional. When everything melts together, add 1 tsp. of vanilla.


Keep stirring pretty often once the mixture gets bubbly.


Keep stirring, making sure nothing sticks to the bottom of the pot. Scorched toffee doesn't taste good. As the temperature approaches 250 degrees or so, the mixture will thicken and the color will start to deepen into a nice caramel shade. It also starts to smell like caramel.


You're aiming for the "soft crack" stage of candy making, which is 285-290 degrees F. Some people can tell when the toffee is ready to pour just by the color (a little darker than the photo above) and the smell. I turn off the heat when the toffee reaches 285 degrees (it gets a little hotter than that by the time I pour it). I keep a little piece of parchment paper next to the stove to place the thermometer on while I pour the toffee.


Use your spoon to spread the hot toffee into a thin layer over your pan. Then pile on some chocolate chips (1 to 1 1/2 cups). I like semi-sweet Ghirardelli chips, but you can use whatever you like.


Use a rubber spatula to spread the melted chocolate all over the top of the toffee. You could also sprinkle some sliced almonds over the chocolate while it's still gooey, which is delicious, but I didn't have any almonds, so this batch of toffee just got chocolate topping.


Pro tip: everything sets faster in the fridge. I let the pan cool on the stove or counter for about 15 minutes then pop the whole thing in the fridge (use a towel or potholder - the pan is going to be HOT). Once it's set, break the toffee into small pieces and store at room temp in an airtight container (like a cute Christmas tin).

If you soak your pot, spoon, and thermometer overnight, clean-up is easy, too.
Monday, December 5, 2011

Giveaway!

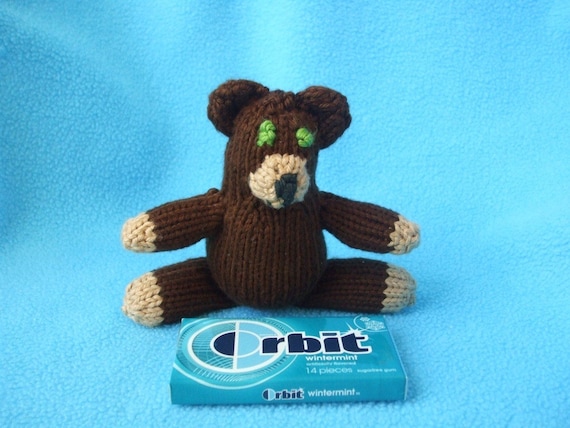
I've said it before, now I'm saying it again. I'm a bad blogger. And there's something I should have posted on here DAYS ago, but I'm just now getting around to it. I'm sponsoring my first giveaway! You can find it over at Mommy's Moments. They have a lot of great sponsors for the Blog Bash Christmas giveaway. My contribution is this cute little guy:


The giveaway ends tomorrow, so head over now and check out how to enter!

Tuesday, November 29, 2011

Facebook

Hi everyone! It's been a while since I posted here. Just wanted to put it out there that LaTina Steele Designs now has a Facebook page! Feel free to click the Like button over there on my sidebar ;-)

Saturday, September 10, 2011

Breakfast!

I'm not sure this qualifies as "crafty," but I'm posting it here anyway. We've been experiencing cooler than normal temperatures here in Mobile this week, after Tropical Storm Lee, and it has me craving all things pumpkin. So this morning I'm making Chocolate Chip Pumpkin Muffins for breakfast. I modified a recipe from Allrecipes.com to make these amazing fall breakfast treats.

I started using my modified version of this recipe last fall, and Max LOVES them. They were the first muffins he ever liked, and are by far his favorite muffins. And they have veggies in them, so I definitely win.

Here's my version:
  • 3/4 c. brown sugar
  • 1/4 vegetable oil (I used canola)
  • 2 eggs
  • 1 c. canned pumpkin
  • 1/4 c. water
  • 3/4 c. whole wheat flour
  • 3/4 c. all purpose flour
  • 3/4 tsp. baking powder
  • 1/2 tsp. baking soda
  • 1/4 tsp. salt
  • 1/4 tsp. ground cloves
  • 1-1/2 tsp. ground cinnamon
  • 1/2 tsp. ground nutmeg
  • 1/2 c. semi-sweet chocolate chips
Preheat oven to 400 F, and line a 12 cup muffin tin with paper liners. Combine flours, baking powder, baking soda, salt, and spices in a bowl. In another large bowl, mix sugar, oil, and eggs then add pumpkin and water (I use a wire whisk and mix everything by hand). Stir in the dry ingredients then mix in the chocolate chips. Evenly divide the batter among the 12 muffin cups (each one will be almost full) and bake for 20 minutes.

Wednesday, May 11, 2011

Elephants in Stripes!

I've already posted a photo of this little guy on Twitter, but I decided to share him here as well. Last month, I got a really fun, creative request from an Etsy customer. She was looking for an elephant for her son that matched a favorite outfit. She sent me a picture of the stripe pattern on the shirt, and this is what I created for her:


I can't even begin to tell you how pleased I am with the final product. He turned out So Cute. The customer thought so, too, and she sent me a photo of her son holding his new elephant and wearing the matching outfit. I totally gave myself props for doing an excellent job matching both the colors and the varying widths of the stripes. The photo was pricelessly adorable (I won't share that here, for obvious reasons).

As I was knitting the multicolor elephant, Max decided that he wanted me to make him an elephant, too. First, he said he wanted a blue elephant. Then he wanted a yellow one. Then he wanted a red one. When the red choice seemed to stick, I started on Max's elephant. And of course, as three year olds do, Max changed his mind mid-knit and decided he wanted red and blue. So this is what he got:


After complaining a bit about the addition of the blue stripes ("But I didn't want blue, too!"), Max decided that he LOVES his new elephant, and it has replaced Tigger as his favorite sleeping buddy.

After the success of the striped elephants I've completed, I'm thinking about making another one in a 3 or 4 color combo to include in my Etsy shop. I just have to decide on the color combo.

In the meantime, I've started working on a new design, which I'll probably tweak a bit, but for now I have listed Penny the Pig in my Etsy shop.


Sunday, March 13, 2011

New Design for a New Baby

My boss/friend/undergraduate advisor is adopting a baby, so I decided to knit her a baby gift. A while back, I made the garden snail from Hansi Singh's Amigurumi Knits. While I was pleased with my final product, the snail was actually a huge pain in the ass to knit. Here is how my garden snail turned out:


Way cute, right? But it took FOREVER to complete, which is something you don't really expect form an "amigurumi" knit. I don't really have the patience for that kind of knitting very often, so I decided to try my hand at writing my own snail pattern - in a way that is much simpler than Hansi Singh's version, not to mention light years quicker to knit.

I completed my snail this morning, and I have to say that I'm pretty pleased with the way it turned out:


I think that my boss/friend/undergraduate advisor is going to love it. It doesn't even remotely resemble the conch (which she's spent a lot of time researching in her career) that inspired to me to make a snail for her new baby, but then again, it wasn't really supposed to. Maybe next time.

Saturday, February 12, 2011

Valentine's Socks...with a Twist


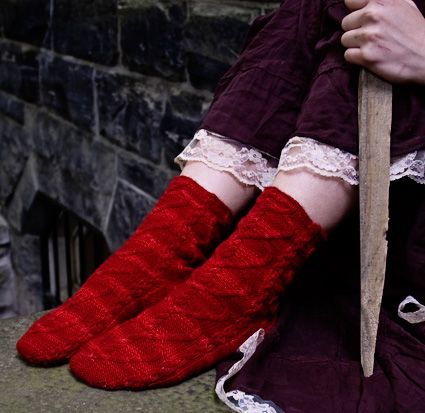
I haven't made these socks yet and, seeing as Valentine's day is in two days, I definitely don't have time to make them in time for Valentine's day this year. But I fell in love with this pattern the moment I saw it, and now I desperately want to make a pair for myself. They're called My Vampire Boyfriend Socks, and the pattern is available for free from Knitty.

I just so happen to have a skein of gorgeous red sock yarn... that is too fine a weight for this pattern. So I'll need to procure some more appropriate yarn to make these beauties. I have quite a stash of sock yarn, including several skeins of fingering/sock weight that would be great in this pattern - I just really love that red, and I don't have it. So it looks like I'll be placing another order from Knit Picks soon. Darn...

Tuesday, February 8, 2011

Featuring.... Me!

Thanks to Jocelyn from The Nesting Spot on Etsy, I recently discovered that my Etsy shop was featured on babble.com's Family Style blog. You can view the article that featured my shop here. Free advertising, woo!

Since being featured in Family Style, I have received tons of orders, and my shop is seeing way more traffic than usual. Which is, of course, a good thing. My biggest fear right now is not being able to knit toys fast enough (not that I ever have as much time for knitting as I would like...).

Speaking of toys... I've just finished two new designs for spring.

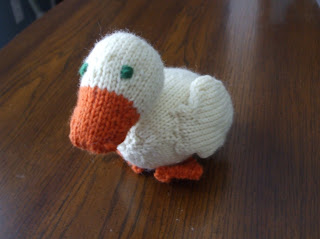
Danny the Duck - he was one of the toys featured on babble.com. The first one sold quickly, and I'm knitting another one as fast as I can.


Next up: Rascal the Rabbit, a tiny bunny sized for Easter baskets (he's about 8 inches from the tip of his ears to the bottom of his legs, his body is about 4 inches without ears or legs).


I have plans to make a larger rabbit by modifying my teddy bear pattern. Now I just have to find the time.

Tuesday, January 4, 2011

Cotty Socks

Oh, hello there. I am such a bad, neglectful blogger. I mentioned a while back that I was working on a pair of Cotty socks using Kollage Yarns Sock-a-licious. Well, I finally finished them. On New Year's Eve. What perfect timing. These socks were my last project of 2010. Feast your eyes:


I can't say enough good things about this yarn, either. It's a blend of wool, silk, and nylon (which is not cheap), and these socks are like heaven on my feet. Happy New Year to me.